


Are you excited about getting a new Ring Doorbell but unsure how to install it? Don’t worry; I’ve got you covered! I’ve installed Ring Doorbells before, and it’s a simple process if you follow the steps carefully. In this guide, I’ll walk you through the process step-by-step, so you can get your smart doorbell up and running in no time.

Tools and Materials You’ll Need
Before you start, make sure you have everything ready. Here’s a quick list:
- Your Ring Doorbell (with the installation kit that comes in the box)
- A smartphone or tablet (with the Ring app installed)
- A drill (if needed for mounting)
- Screwdriver (usually included in the kit)
- Level (often included in the kit)
- Anchor screws (if mounting on concrete, brick, or stucco)
Having all these tools ready will make the installation process smooth and stress-free.
Step 1: Download the Ring App and Set Up Your Device
- Download the Ring App: Go to the App Store (iOS) or Google Play Store (Android) and download the Ring app.
- Create an Account: Open the app and follow the instructions to create a new account if you don’t already have one.
- Set Up Your Ring Doorbell: Tap the “Set Up a Device” option in the app, choose “Doorbells,” and follow the on-screen instructions. This will include connecting your Ring Doorbell to your Wi-Fi network. Make sure your Wi-Fi signal is strong where you plan to install the device.
Step 2: Choose the Perfect Spot for Your Doorbell
Decide where you want to mount your Ring Doorbell. Ideally, it should be at chest height (about 4 feet from the ground) for the best video coverage. Also, ensure it’s within range of your Wi-Fi signal.
If you’re replacing an existing wired doorbell, you can install it in the same spot. If not, you can install it anywhere you like, but you’ll need to charge its battery regularly if it’s not wired.
Step 3: Mount the Bracket
- Position the Bracket: Hold the mounting bracket against the wall where you want to install the doorbell. Use the included level to make sure it’s straight.
- Mark the Holes: Use a pencil to mark where you’ll drill the holes for the screws.
- Drill the Holes: If you’re mounting the doorbell on wood, you can screw it directly. For concrete, brick, or stucco, use a drill to make holes and insert the provided anchors.
- Attach the Bracket: Screw the mounting bracket securely to the wall.
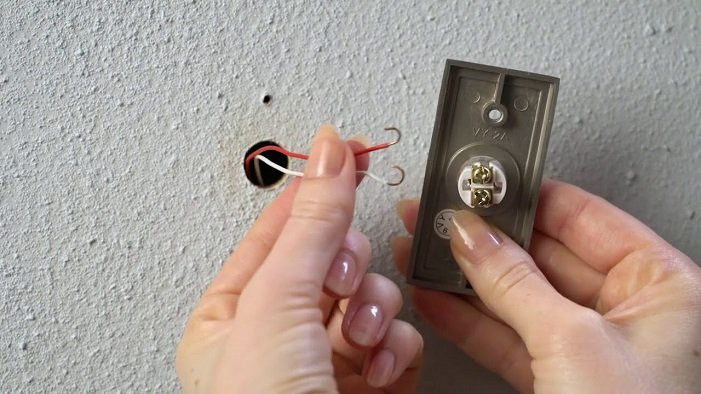
Step 4: Connect the Wires (For Wired Installations)
If you’re replacing an old wired doorbell:
- Turn Off the Power: Shut off the power to your doorbell circuit at your home’s breaker box.
- Connect the Wires: Attach the existing doorbell wires to the terminals on the back of your Ring Doorbell. It doesn’t matter which wire goes to which terminal.
- Secure the Doorbell: After connecting the wires, attach your Ring Doorbell to the mounting bracket.
Step 5: Attach the Ring Doorbell
- Align the Doorbell: Line up your Ring Doorbell with the mounting bracket.
- Secure It: Use the included screws to secure the doorbell to the bracket. Make sure it’s tight but don’t overtighten.
Step 6: Test the Doorbell
- Turn the Power Back On: If you’ve wired the doorbell, turn the power back on at the breaker.
- Test the Device: Press the button on your Ring Doorbell to ensure it’s working. Check the live video feed on the Ring app to confirm that the camera and microphone are functioning.
Step 7: Final Adjustments
Once everything is working, you can fine-tune the settings in the Ring app:
- Adjust the motion detection zones to avoid unnecessary alerts.
- Set up notifications so you’re alerted when someone is at your door.
- Customize privacy settings if needed.
Tips for a Successful Installation
- Charge the Battery: If you’re using a battery-powered Ring Doorbell, fully charge the battery before installation.
- Check Your Wi-Fi Signal: Ensure the signal strength is good where you plan to install the doorbell.
- Use the Right Tools: Using the correct drill bits and screws for your wall type will make the job easier. Read More